You can confidently use a 172nm excimer lamp, even if you are new to this technology. This guide gives you simple steps and clear advice. You will find easy explanations for technical terms. You learn to match the lamp to your project and avoid mistakes.
What Is a 172nm Excimer Lamp?
How Excimer Lamps Work
You might ask how an excimer lamp makes light. The lamp has a special gas inside. When you turn it on, the gas forms excimer molecules. These molecules do not last long. When they go back to normal, they give off energy as ultraviolet, or uv, light. The 172nm excimer lamp shines uv light at 172 nanometers. This kind of light is much shorter than what your eyes can see.
Excimer lamps do not have filaments like normal bulbs. They use high-voltage discharge to excite the gas. This makes the lamp work well for some jobs. You get a strong and steady uv light from it.
Common Uses for 172nm Excimer Lamps
You can use 172nm Excimer VUV Light for many things. The short wavelength helps clean and sterilize surfaces. People use them to remove organic stuff from glass or metal. You might see them in electronics too. Here, excimer lamps clean silicon wafers and get surfaces ready for bonding.
Some other uses are:
- Disinfecting water and air
- Breaking down bad stuff in the environment
- Curing special coatings or adhesives
The 172nm excimer lamp is best for deep cleaning or quick chemical changes. The strong uv energy can break up germs, dirt, or chemicals. That is why many people in science and industry use this lamp.
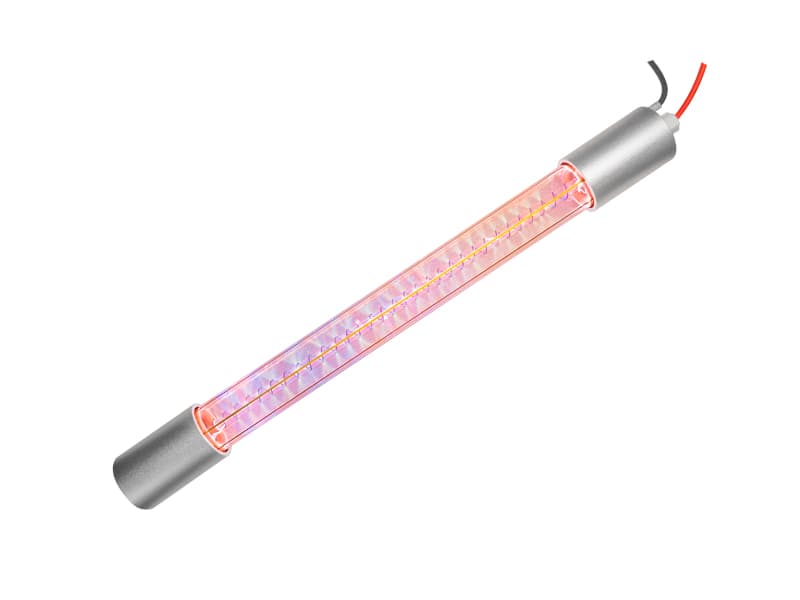
Choosing a 172nm Excimer Lamp
Define Your Project Needs
You should start by thinking about what you want to do with your lamp. Write down your main goal. Do you want to clean surfaces, cure coatings, or disinfect water? Each project needs a different setup. You may need a strong uv output for fast cleaning. You may want a steady light for curing glue.
You should also think about the size of the area you want to treat. A small lab test needs less power than a big factory line. If you know your project needs, you can pick the right excimer lamp.
Key Specifications to Compare
You will see many numbers when you look at excimer lamps. Some numbers matter more than others. Here are the key things to check:
- Wavelength: Make sure the lamp gives uv light at 172 nanometers. This is important for your results.
- Output Power: Higher power means stronger uv light. You may need more power for bigger jobs.
- Uniformity: Check if the lamp gives even light across the area. Uneven light can cause poor results.
- Cooling Needs: Some lamps get hot. See if you need extra cooling.
- Size and Shape: Pick a lamp that fits your workspace.
Lamp Lifetime and Stability
You want your lamp to last a long time. Check the lifetime rating. Most excimer lamps last from 2,000 to 10,000 hours. A longer life means you change the lamp less often.
Stability is also important. A stable lamp gives the same uv output every time you use it. This helps you get repeatable results. Ask the supplier for data on how stable the lamp stays over time.
Where to Buy and Supplier Tips
You should buy your 172nm excimer lamp from a trusted supplier. Look for companies with good reviews. Ask if they give support and answer questions. A good supplier will help you pick the right lamp and give you advice on setup.
Here are some tips:
- Ask for a warranty.
- Check if they offer technical support.
- See if they have spare parts.
- Compare prices, but do not pick only the cheapest.
Using a 172nm Excimer Lamp Safely
Unboxing and Inspection Steps
When you receive your 172nm excimer lamp, you should open the box carefully. Use clean hands or gloves to avoid getting dirt on the lamp. Check the lamp for cracks or broken parts. Look at the power cables and connectors. Make sure nothing looks damaged. If you see any problems, contact your supplier before you try to use the lamp.
You should also read the manual that comes with the lamp. The manual gives you important information about your model. It tells you about the right voltage and how to connect the lamp.
Installation and Power Setup
You need to place the excimer lamp in a clean and dry area. Make sure the lamp sits on a stable surface. Do not put it near water or in a dusty place. Connect the lamp to the power supply as the manual shows. Double-check the voltage and current settings. Wrong settings can damage the lamp.
Follow these steps for a safe setup:
- Turn off the power before you connect anything.
- Attach the lamp to the power supply using the right cables.
- Secure the lamp in its holder or mount.
- Check all connections again.
- Turn on the power supply and watch for any warning lights or sounds.
Safety Precautions for Excimer Lamps
The light from an excimer lamp is very strong. It gives off uvc light, which can hurt your eyes and skin. Never look directly at the lamp when it is on. Always wear safety glasses that block uvc. You should also wear gloves and cover your skin.
Set up shields or barriers around the lamp. This keeps the uvc light from reaching people nearby. Only trained people should use the lamp. Put warning signs near the lamp to remind others about the danger.
Handling 172nm Light Attenuation
The 172nm light from your excimer lamp does not travel far in air. The energy drops quickly because air absorbs this short-wave uv. You need to keep the lamp close to the surface you want to treat. If you use the lamp for excimer lamp exposure, place the target just a few millimeters from the lamp window.
Some setups use a special chamber filled with an inert gas like nitrogen. This helps the 172nm light reach the surface better. If you want the best results, try to reduce the air gap between the lamp and your target.
Basic Troubleshooting
If your lamp does not turn on, check the power supply first. Make sure all cables are tight. Look for any warning lights on the power unit. If the lamp flickers or the uv output seems weak, turn off the lamp and let it cool. Check for dust or dirt on the lamp window. Clean it gently with a soft cloth if needed.
If you still have problems, read the manual again. Many manuals have a troubleshooting table. If you cannot fix the issue, contact your supplier for help.
Tips for Excimer Lamp Curing and Maintenance
Maintenance for Long Life
You want your 172nm excimer lamp to last as long as possible. Clean the lamp window often with a soft, lint-free cloth. Dust and fingerprints can block uv light and lower performance. Check the lamp for signs of wear or damage before each use. Replace any worn parts right away. Keep the lamp in a dry, cool place when you do not use it. Always follow the manufacturer's care instructions.
Maximizing Lamp Performance
You can get the best results from excimer lamp curing by keeping the lamp close to the surface. Make sure the lamp sits at the right angle for even uv exposure. Use a chamber with nitrogen if you need stronger uv output. This setup helps the uv light reach the coating better. Keep the lamp window clean for maximum power. If you see any drop in curing speed, check for dirt or damage.
Avoiding Common Mistakes
Many users make simple mistakes during excimer lamp curing. Do not let the lamp run too long without a break. Overheating can shorten its life. Always wear safety gear to protect your eyes and skin from uv. Never use the lamp on a wet or dirty surface. This can block the uv and cause poor coating results. Double-check the distance between the lamp and the coating for even curing.
| Mistake | How to Avoid |
|---|---|
| Overheating | Give the lamp cooling time |
| Skipping cleaning | Wipe the lamp window often |
| Wrong distance | Measure before curing |
Excimer Lamp Curing Best Practices
For the best excimer lamp curing, use uv-curable formulations made for this process. Apply the coating in a thin, even layer. Place the lamp close to the coating for strong uv exposure. Move the lamp slowly and steadily over the surface. Test a small area first to check the curing result. Adjust the speed and distance if needed. You will get smooth, strong coatings with these steps.
FAQ
What safety gear do you need when using a 172nm excimer lamp?
You should wear UV-blocking safety glasses, gloves, and long sleeves. This gear protects your eyes and skin from harmful UV light. Never look directly at the lamp.
Can you use a 172nm excimer lamp in open air?
You can use it in open air, but the UV light weakens quickly. For best results, keep the lamp close to the surface or use a chamber with nitrogen gas.
How do you know when to replace your excimer lamp?
Watch for lower UV output or flickering. If you see these signs, check the lamp hours. Most lamps last 2,000–10,000 hours. Replace the lamp if performance drops.
What should you do if the lamp does not turn on?
First, check the power supply and all cable connections. Make sure the voltage matches the lamp’s requirements. If the lamp still does not work, contact your supplier for help.